Databricks Integration with Formester
Connect Databricks to Formester once, and every published form automatically provisions its own table in your Unity Catalog and streams responses into it — one table per form, no per-form setup.
To set this up you'll need a few details from your Databricks workspace: the Workspace URL, SQL Warehouse ID, the Unity Catalog and Schema to write into, and a Service Principal Client ID and Client Secret for authentication. This guide walks through obtaining each one and connecting them to Formester.
Open the Databricks Integration in Formester
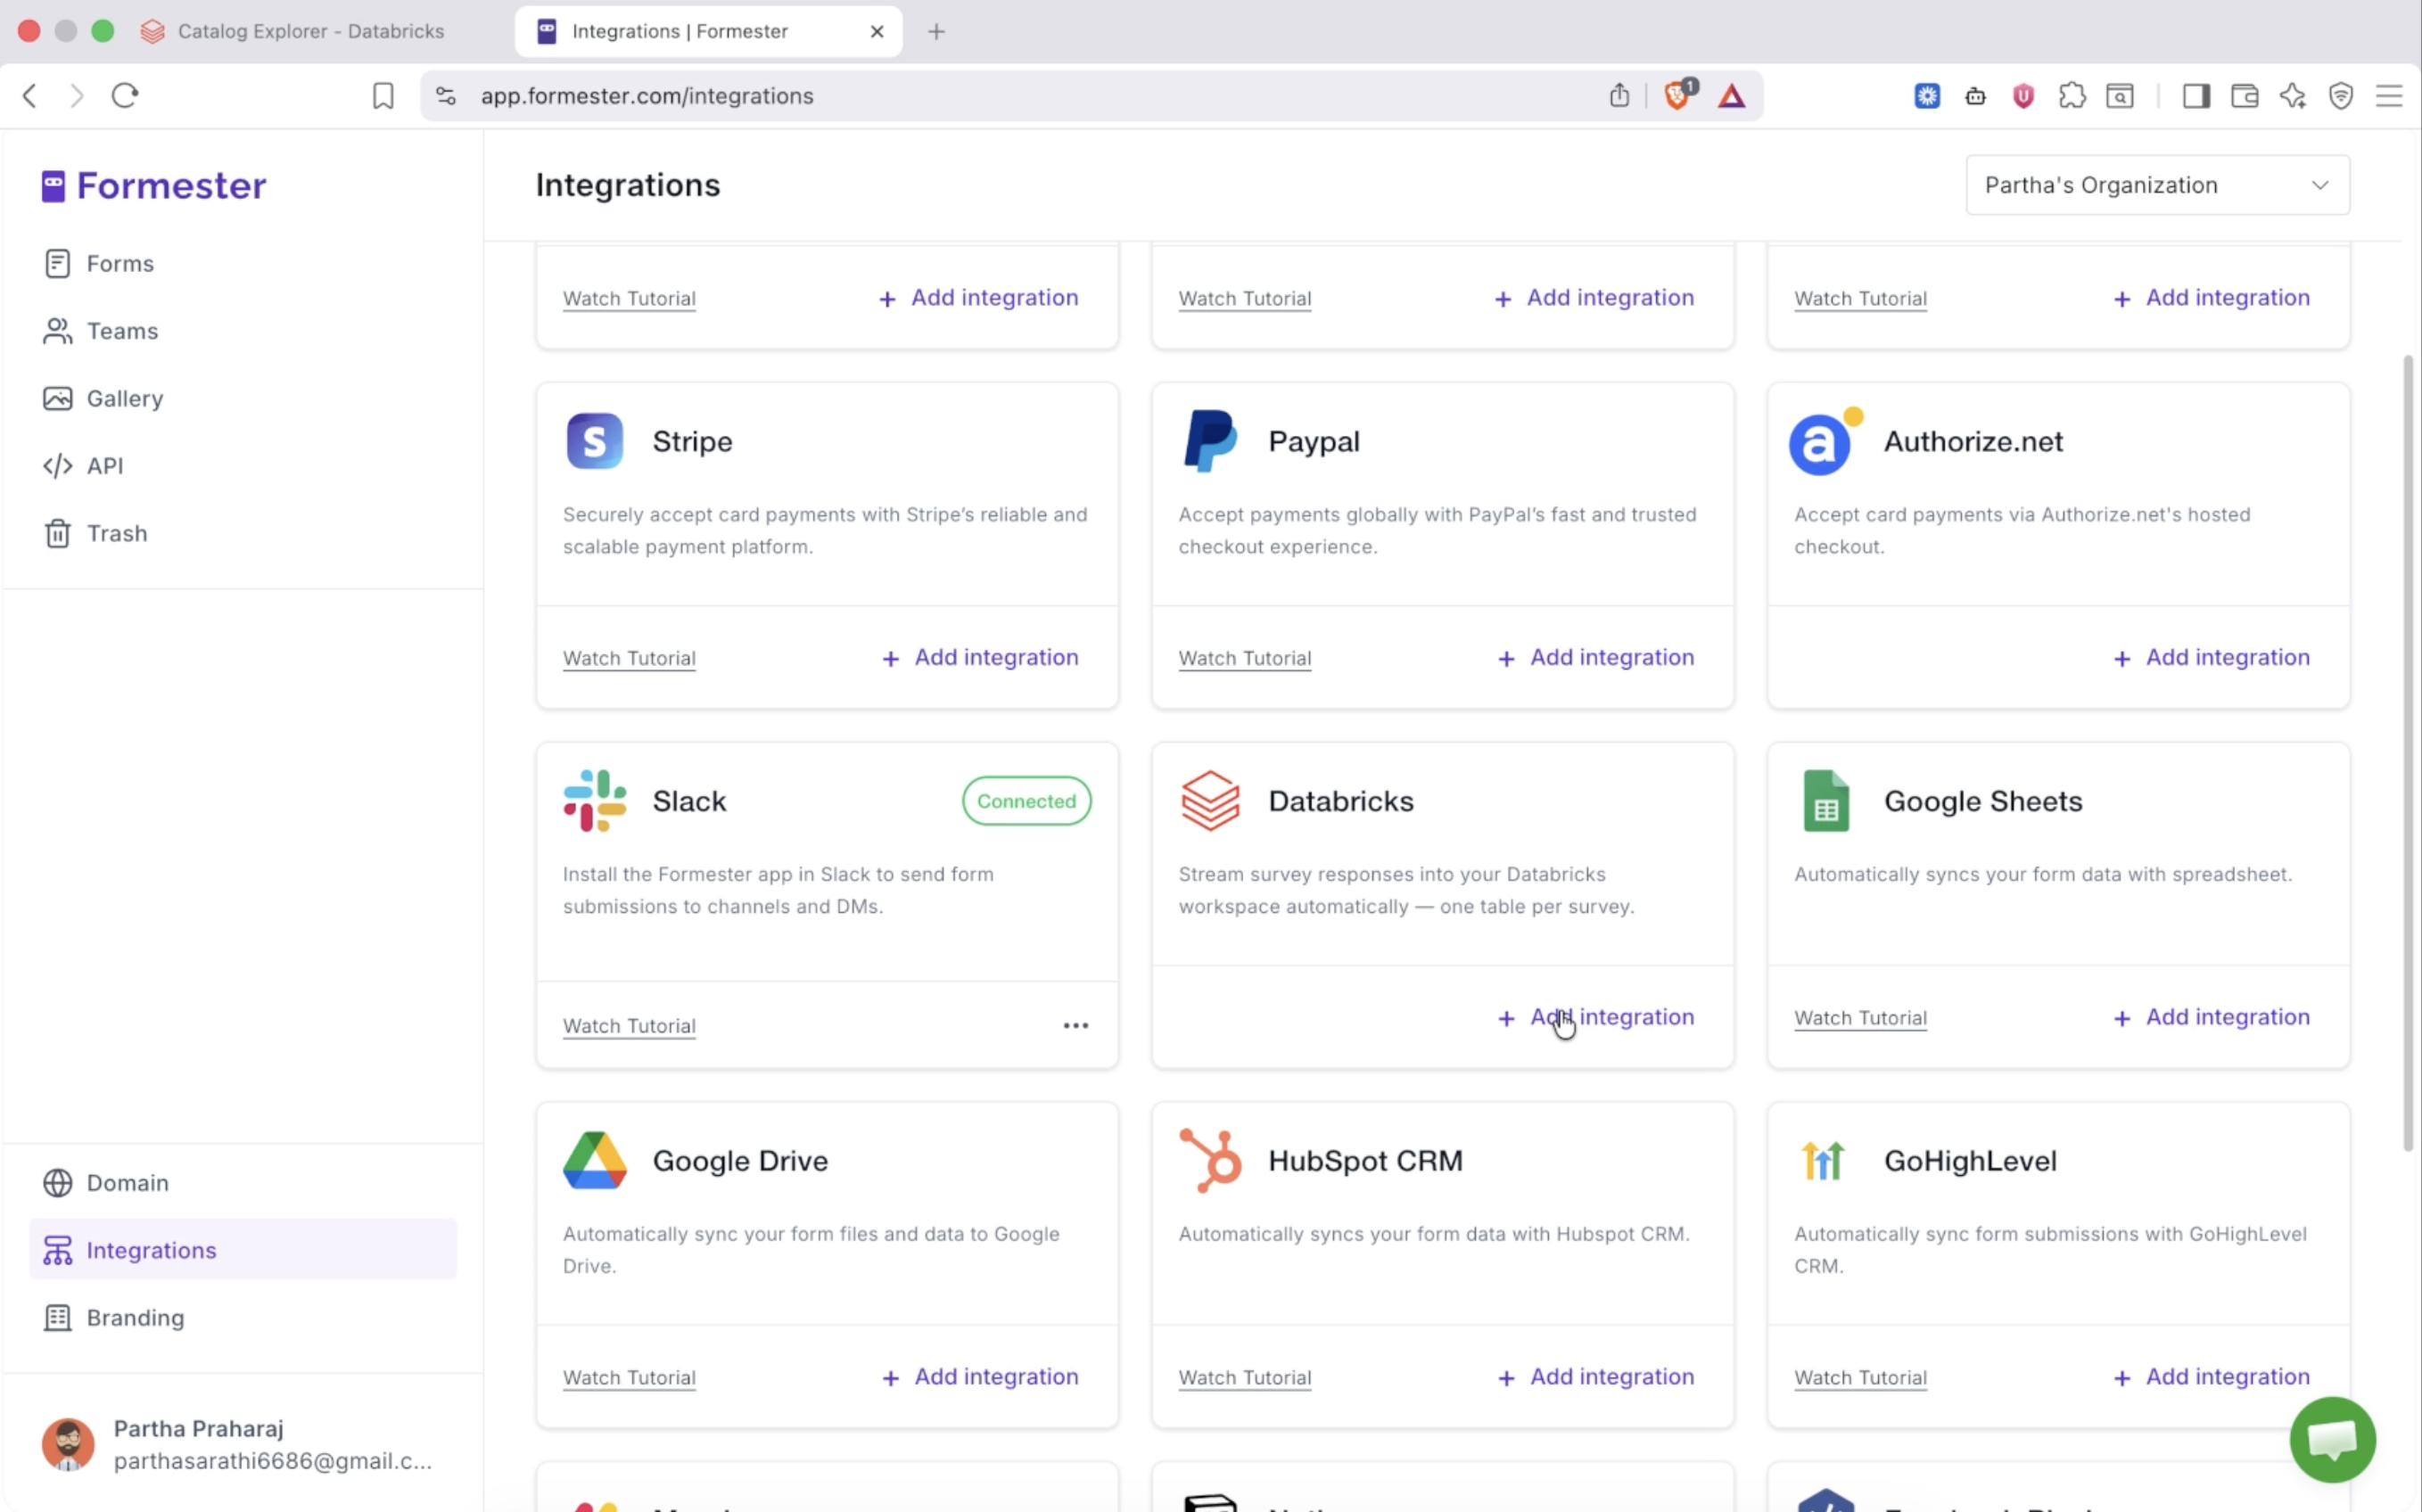
Navigate to the Formester app and open the Integrations section. Find the Databricks card and click Add integration.
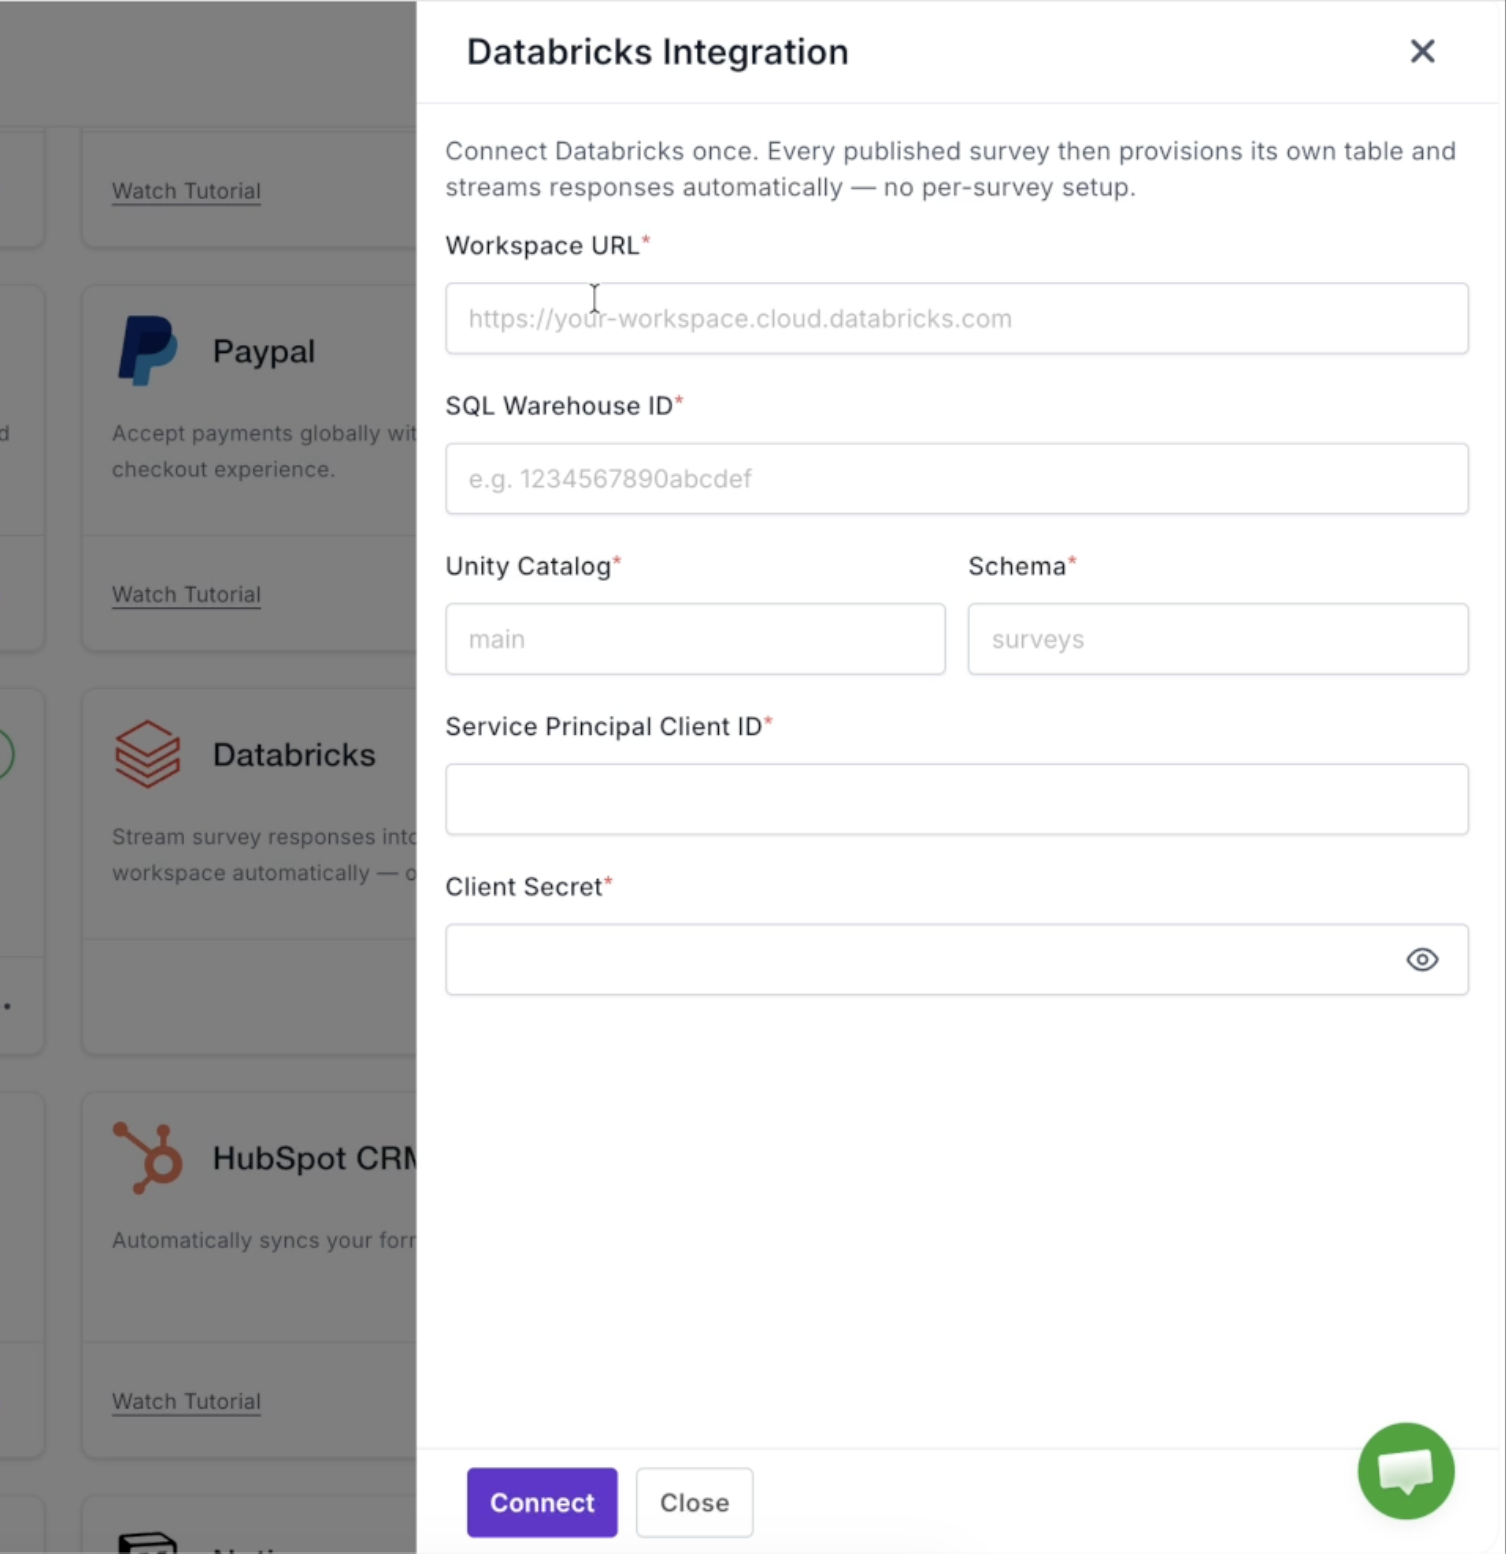
A panel opens with the fields you need to fill in. Keep this open in one tab — you'll gather the values from Databricks in the next steps and come back to it.
Get Your Workspace URL and SQL Warehouse ID
Step 1: Open your SQL Warehouse connection details
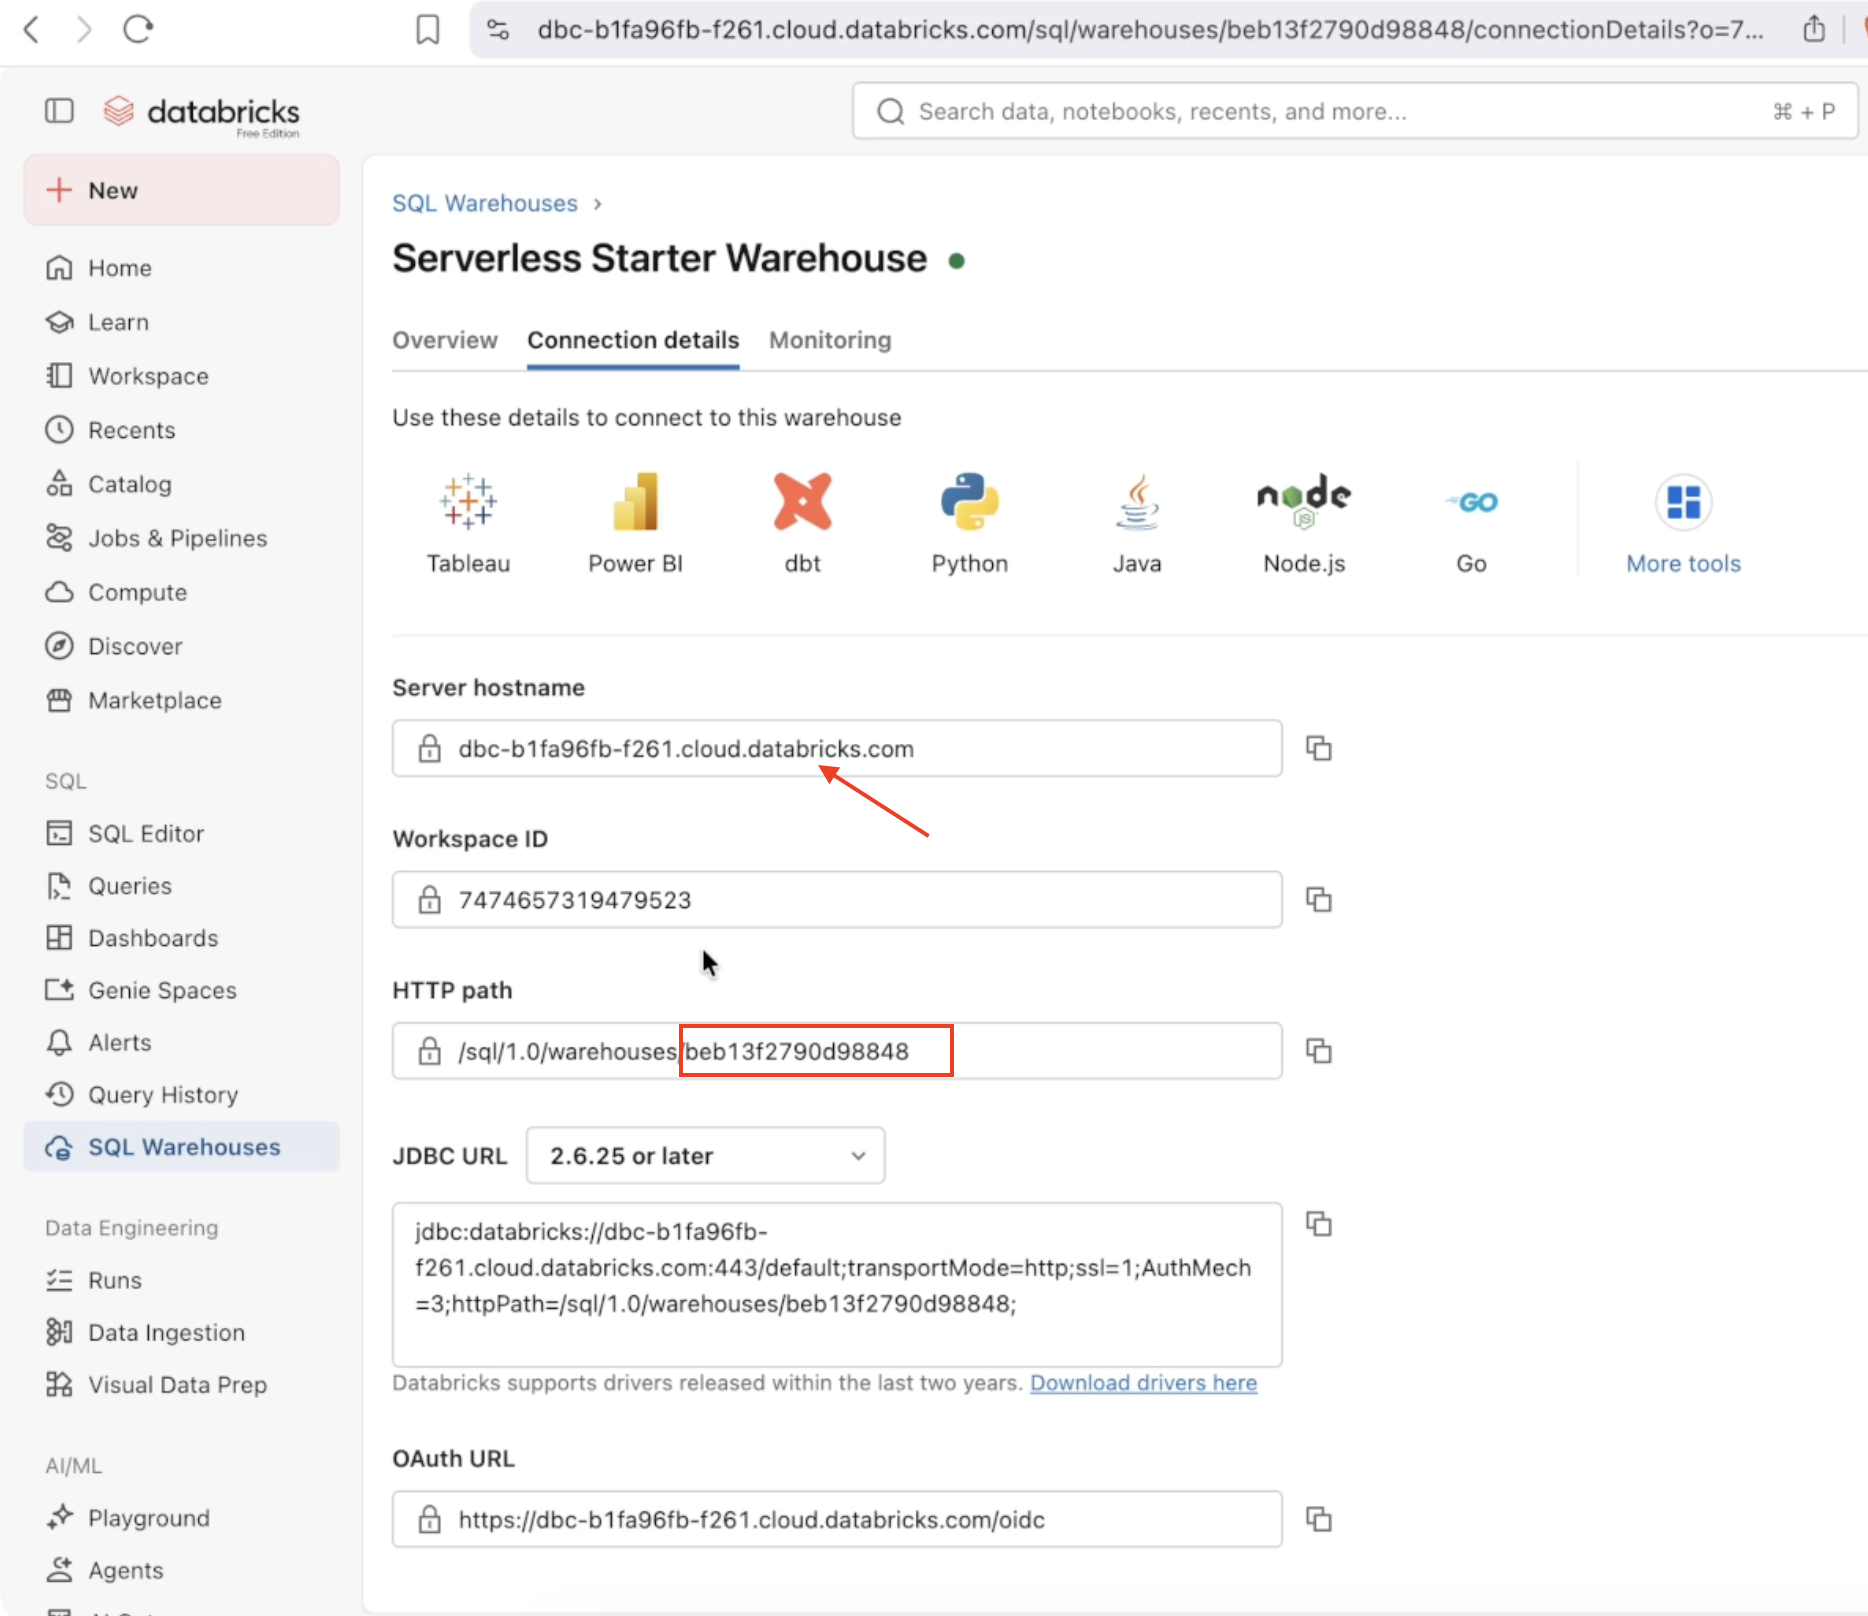
In your Databricks workspace, go to SQL Warehouses, select your warehouse (for example, Serverless Starter Warehouse), and open the Connection details tab.
- Workspace URL — your workspace hostname, prefixed with
https://(for example,https://dbc-xxxxxxxx-xxxx.cloud.databricks.com). - SQL Warehouse ID — the ID at the end of the HTTP path value (
/sql/1.0/warehouses/<this-part>).
Step 2: Note your Unity Catalog and Schema
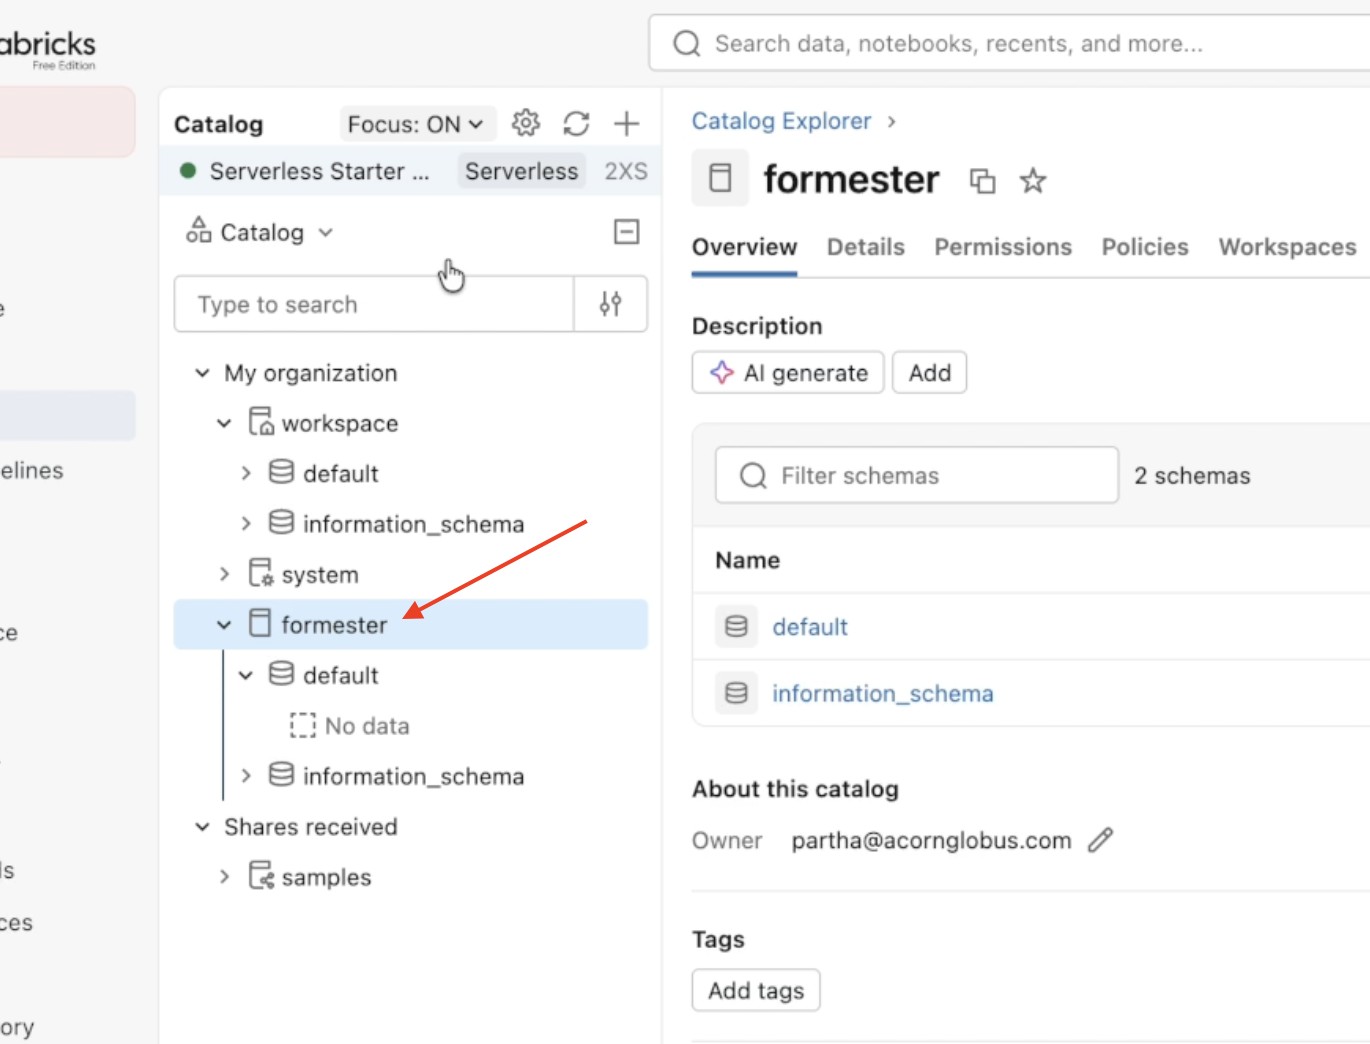
Open Catalog and pick the catalog and schema where Formester should create tables. In this example the catalog is formester and the schema is default. Create a dedicated catalog/schema first if you'd like to keep form data isolated.
Step 3: Fill in the first set of fields in Formester
Back in the Formester panel, enter the Workspace URL, SQL Warehouse ID, Unity Catalog, and Schema.
Create a Service Principal for Authentication
Formester authenticates to Databricks using a service principal with an OAuth secret.
Step 1: Open Identity and access
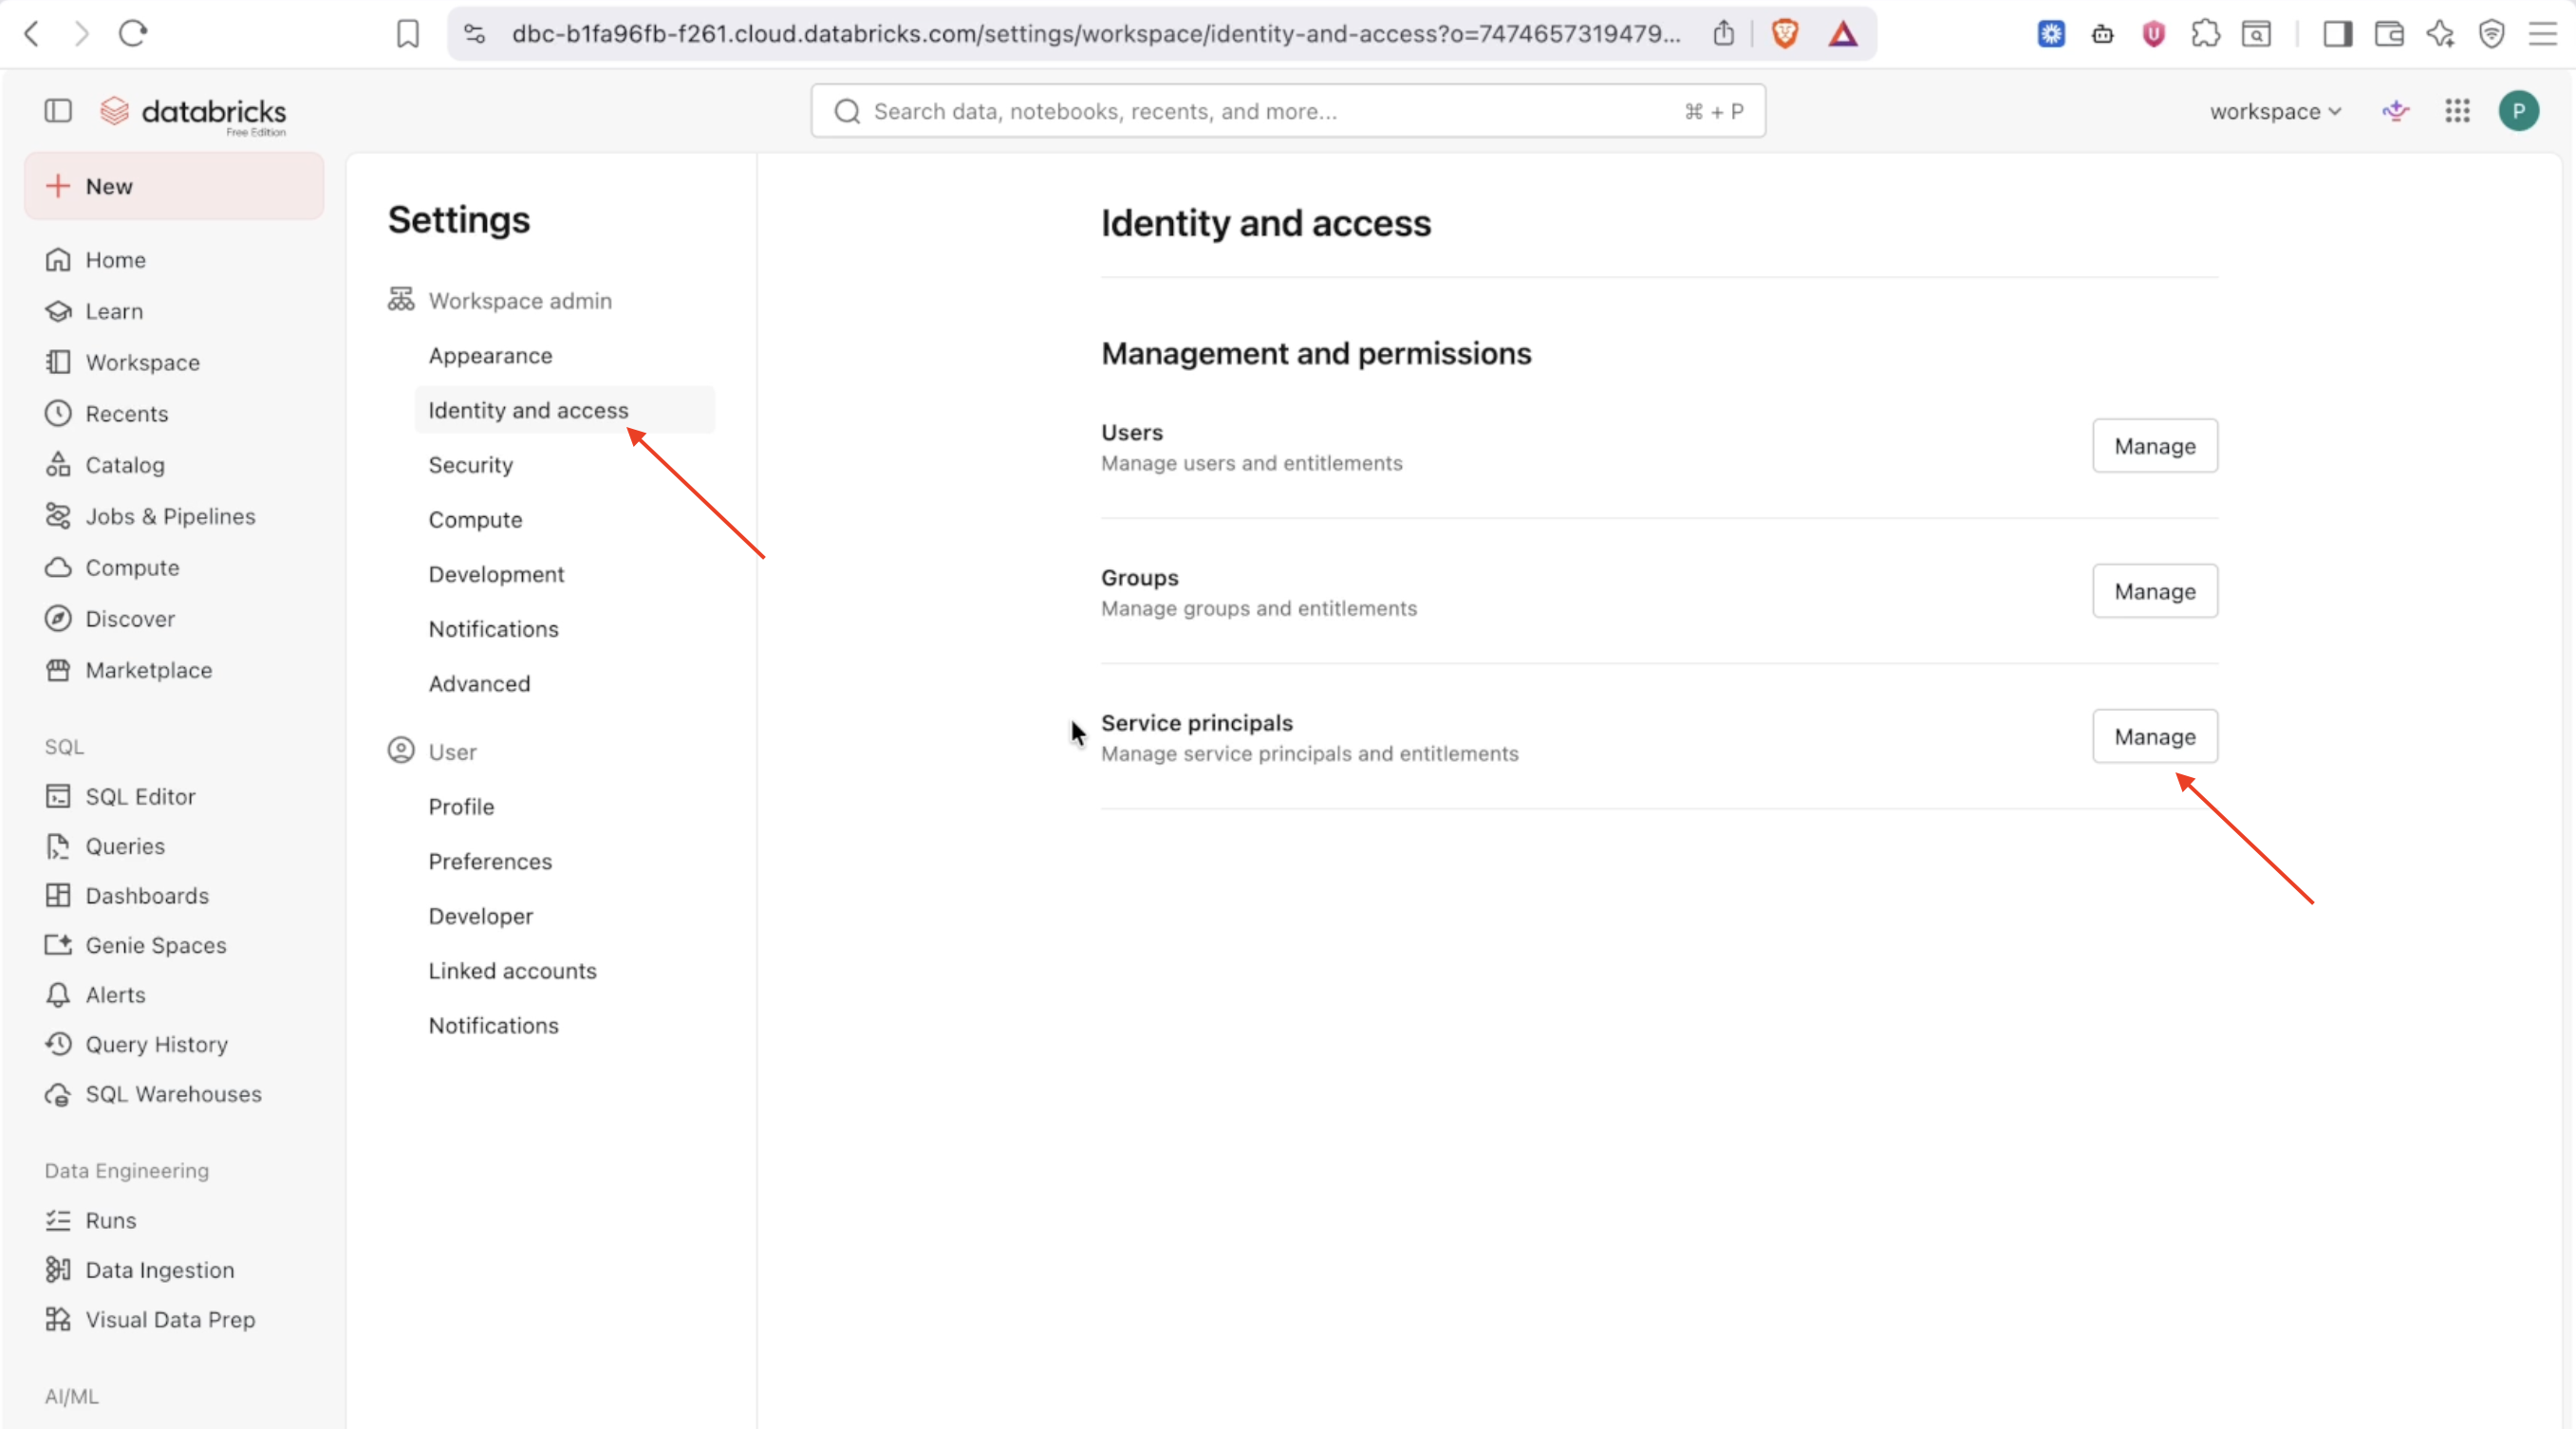
In Databricks, go to Settings → Identity and access. Under Management and permissions, find Service principals and click Manage.
Step 2: Add a service principal
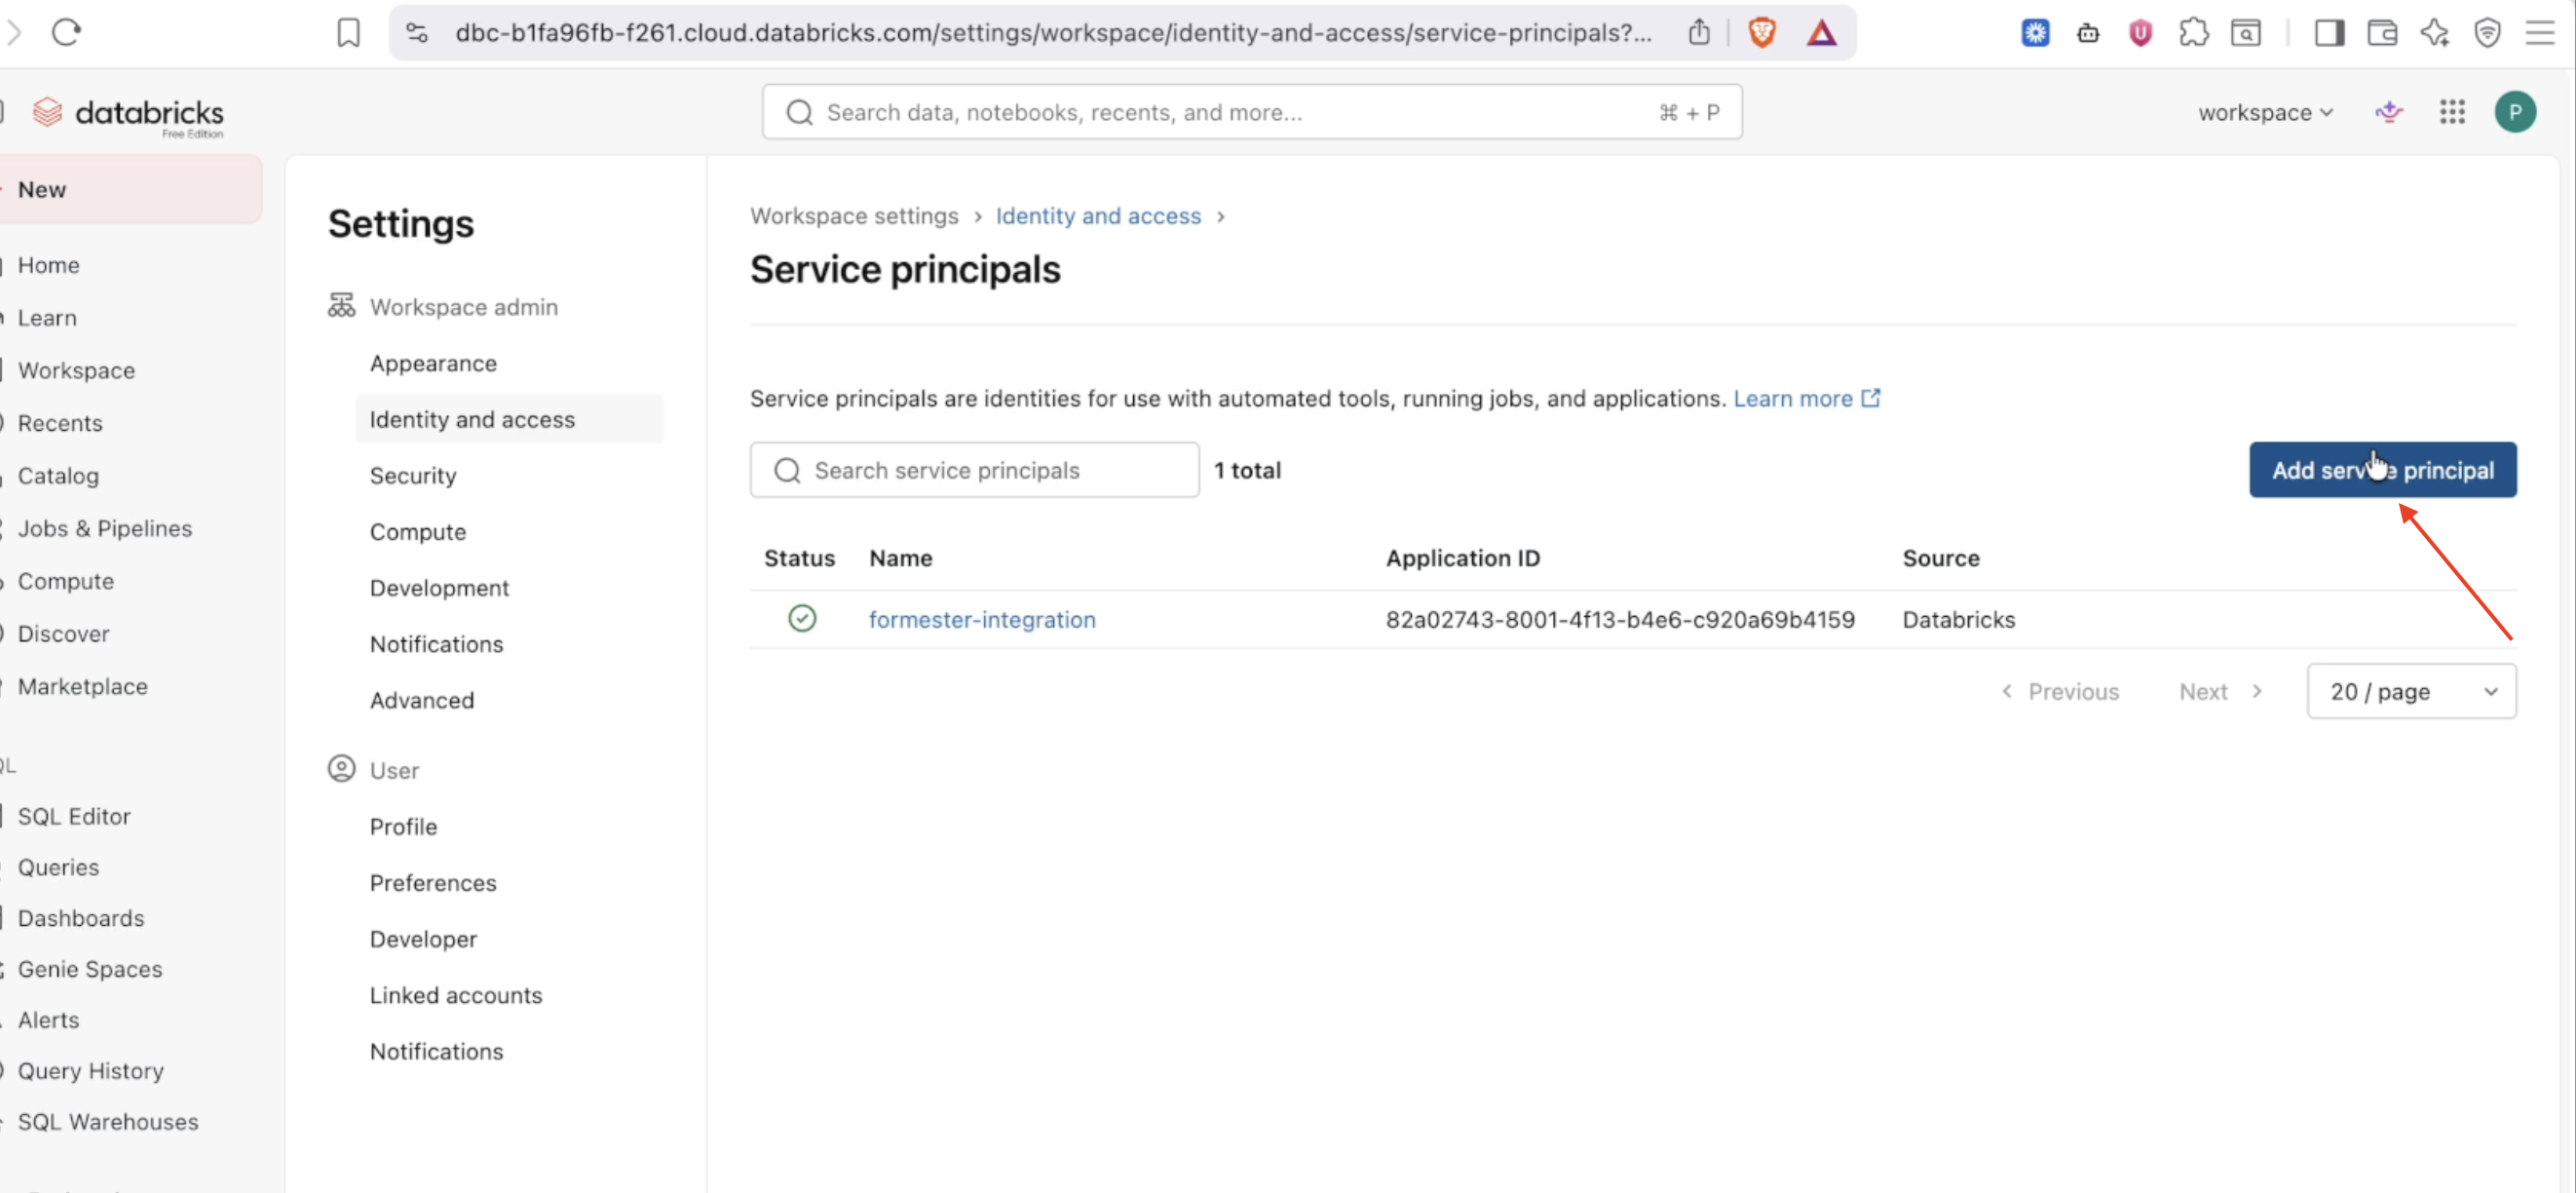
Click Add service principal.
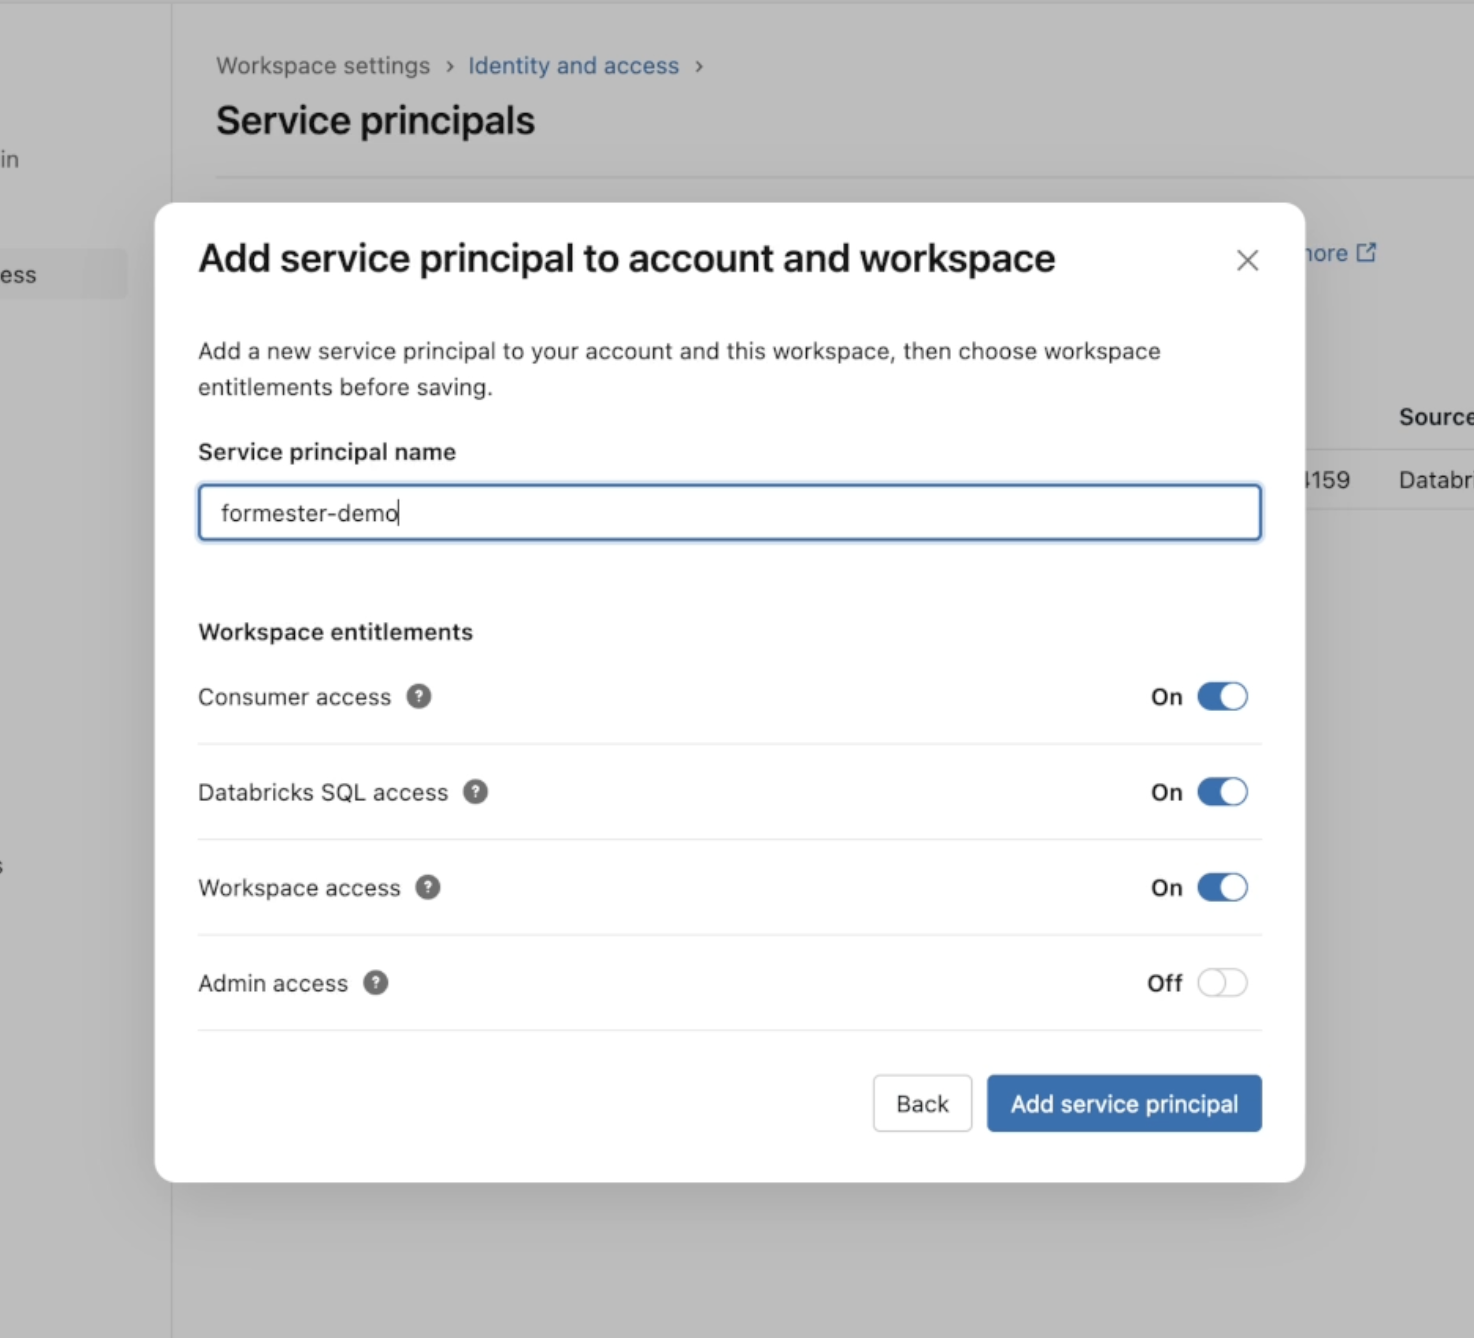
Give it a name (for example, formester-demo). Under Workspace entitlements, enable Consumer access, Databricks SQL access, and Workspace access. Leave Admin access off. Click Add service principal.
Generate an OAuth Secret
Step 1: Open the Secrets tab
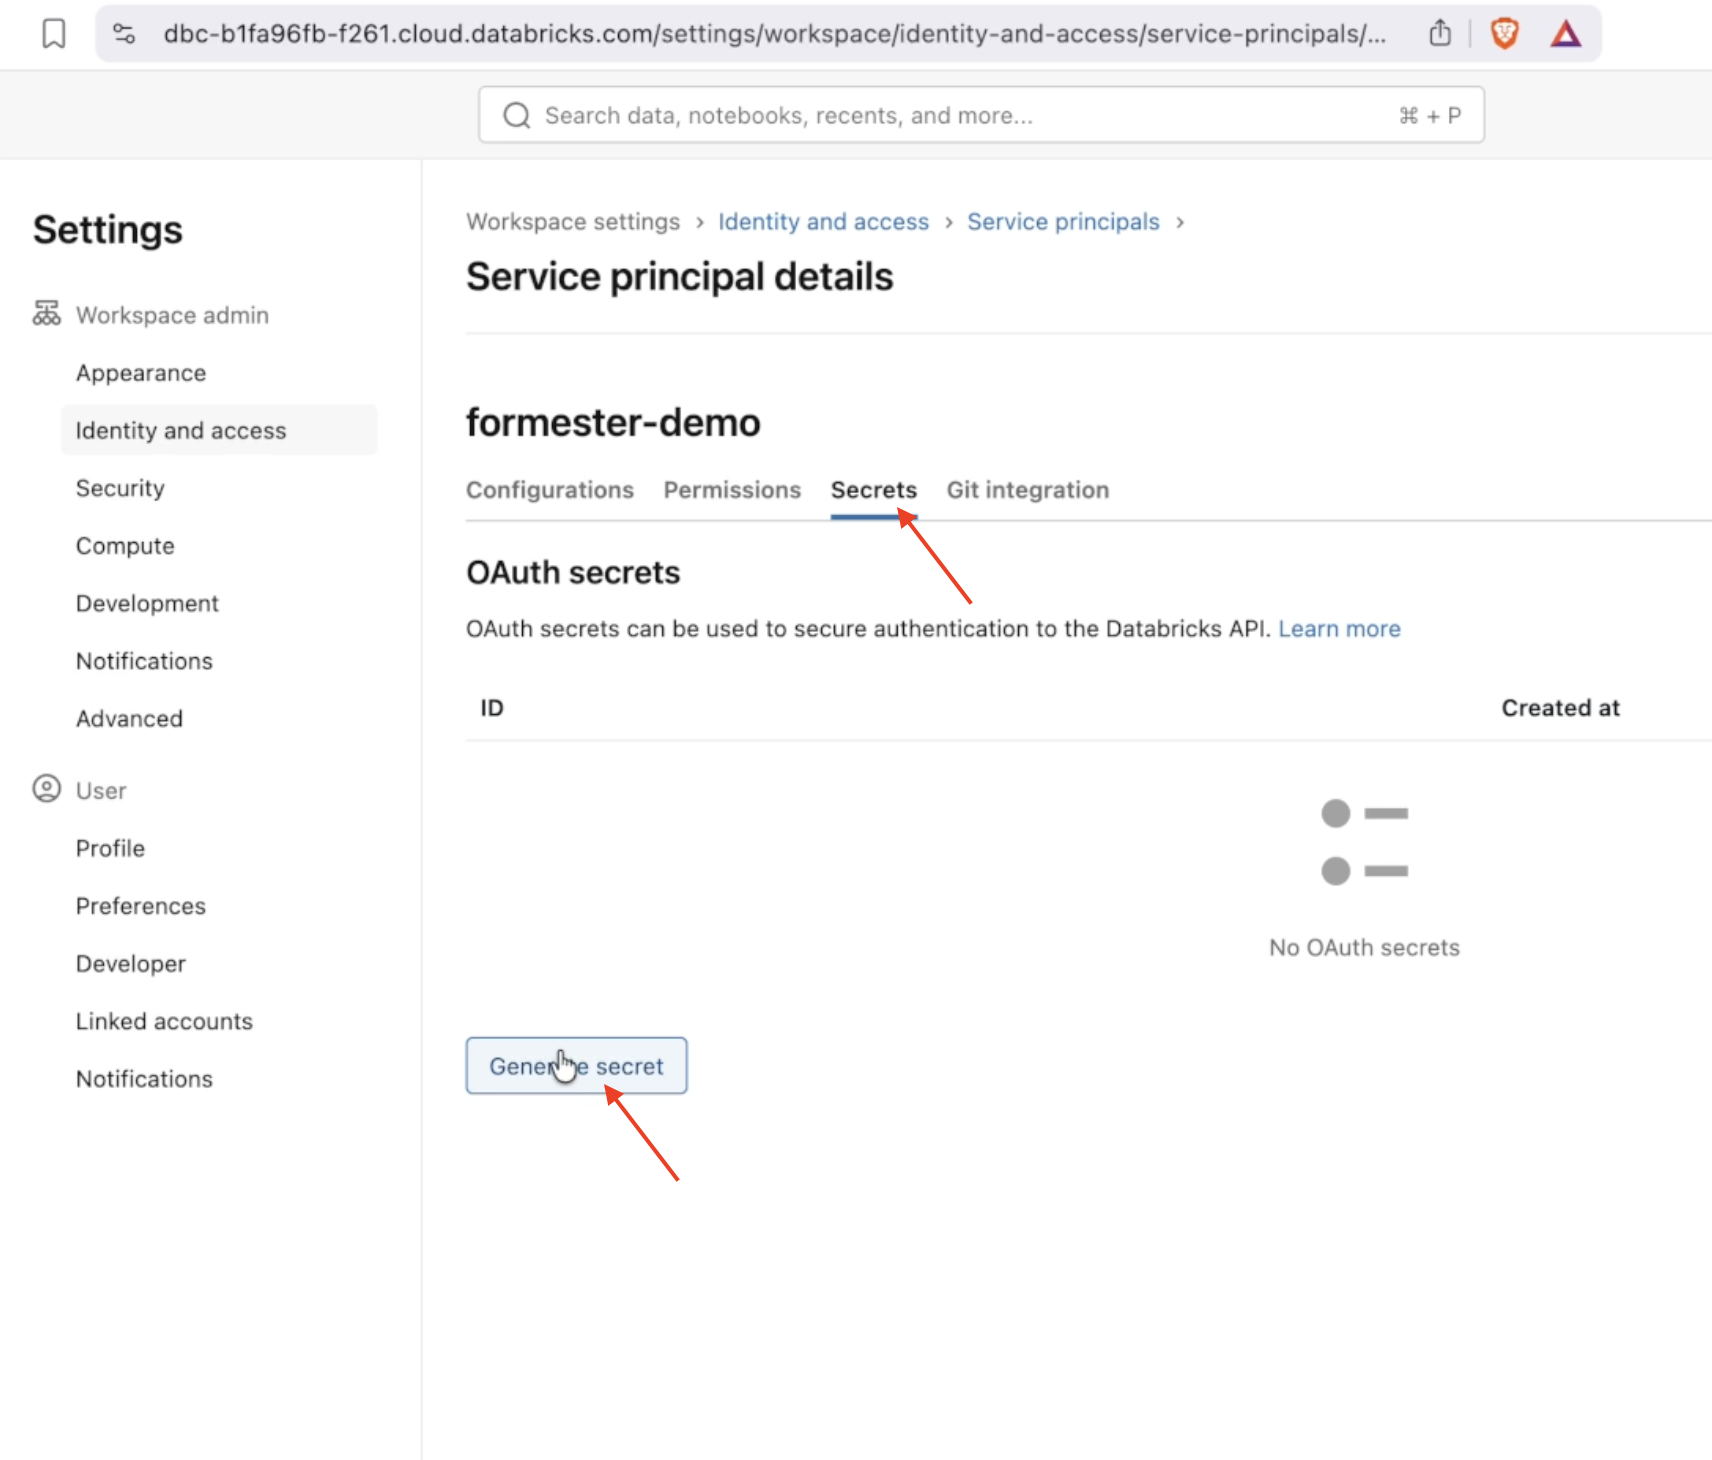
Open the service principal you just created and go to the Secrets tab. Under OAuth secrets, click Generate secret.
Step 2: Set a lifetime
In the dialog, enter a Lifetime (days) for the secret (between 1 and 730), then click Generate.
Step 3: Copy the Secret and Client ID
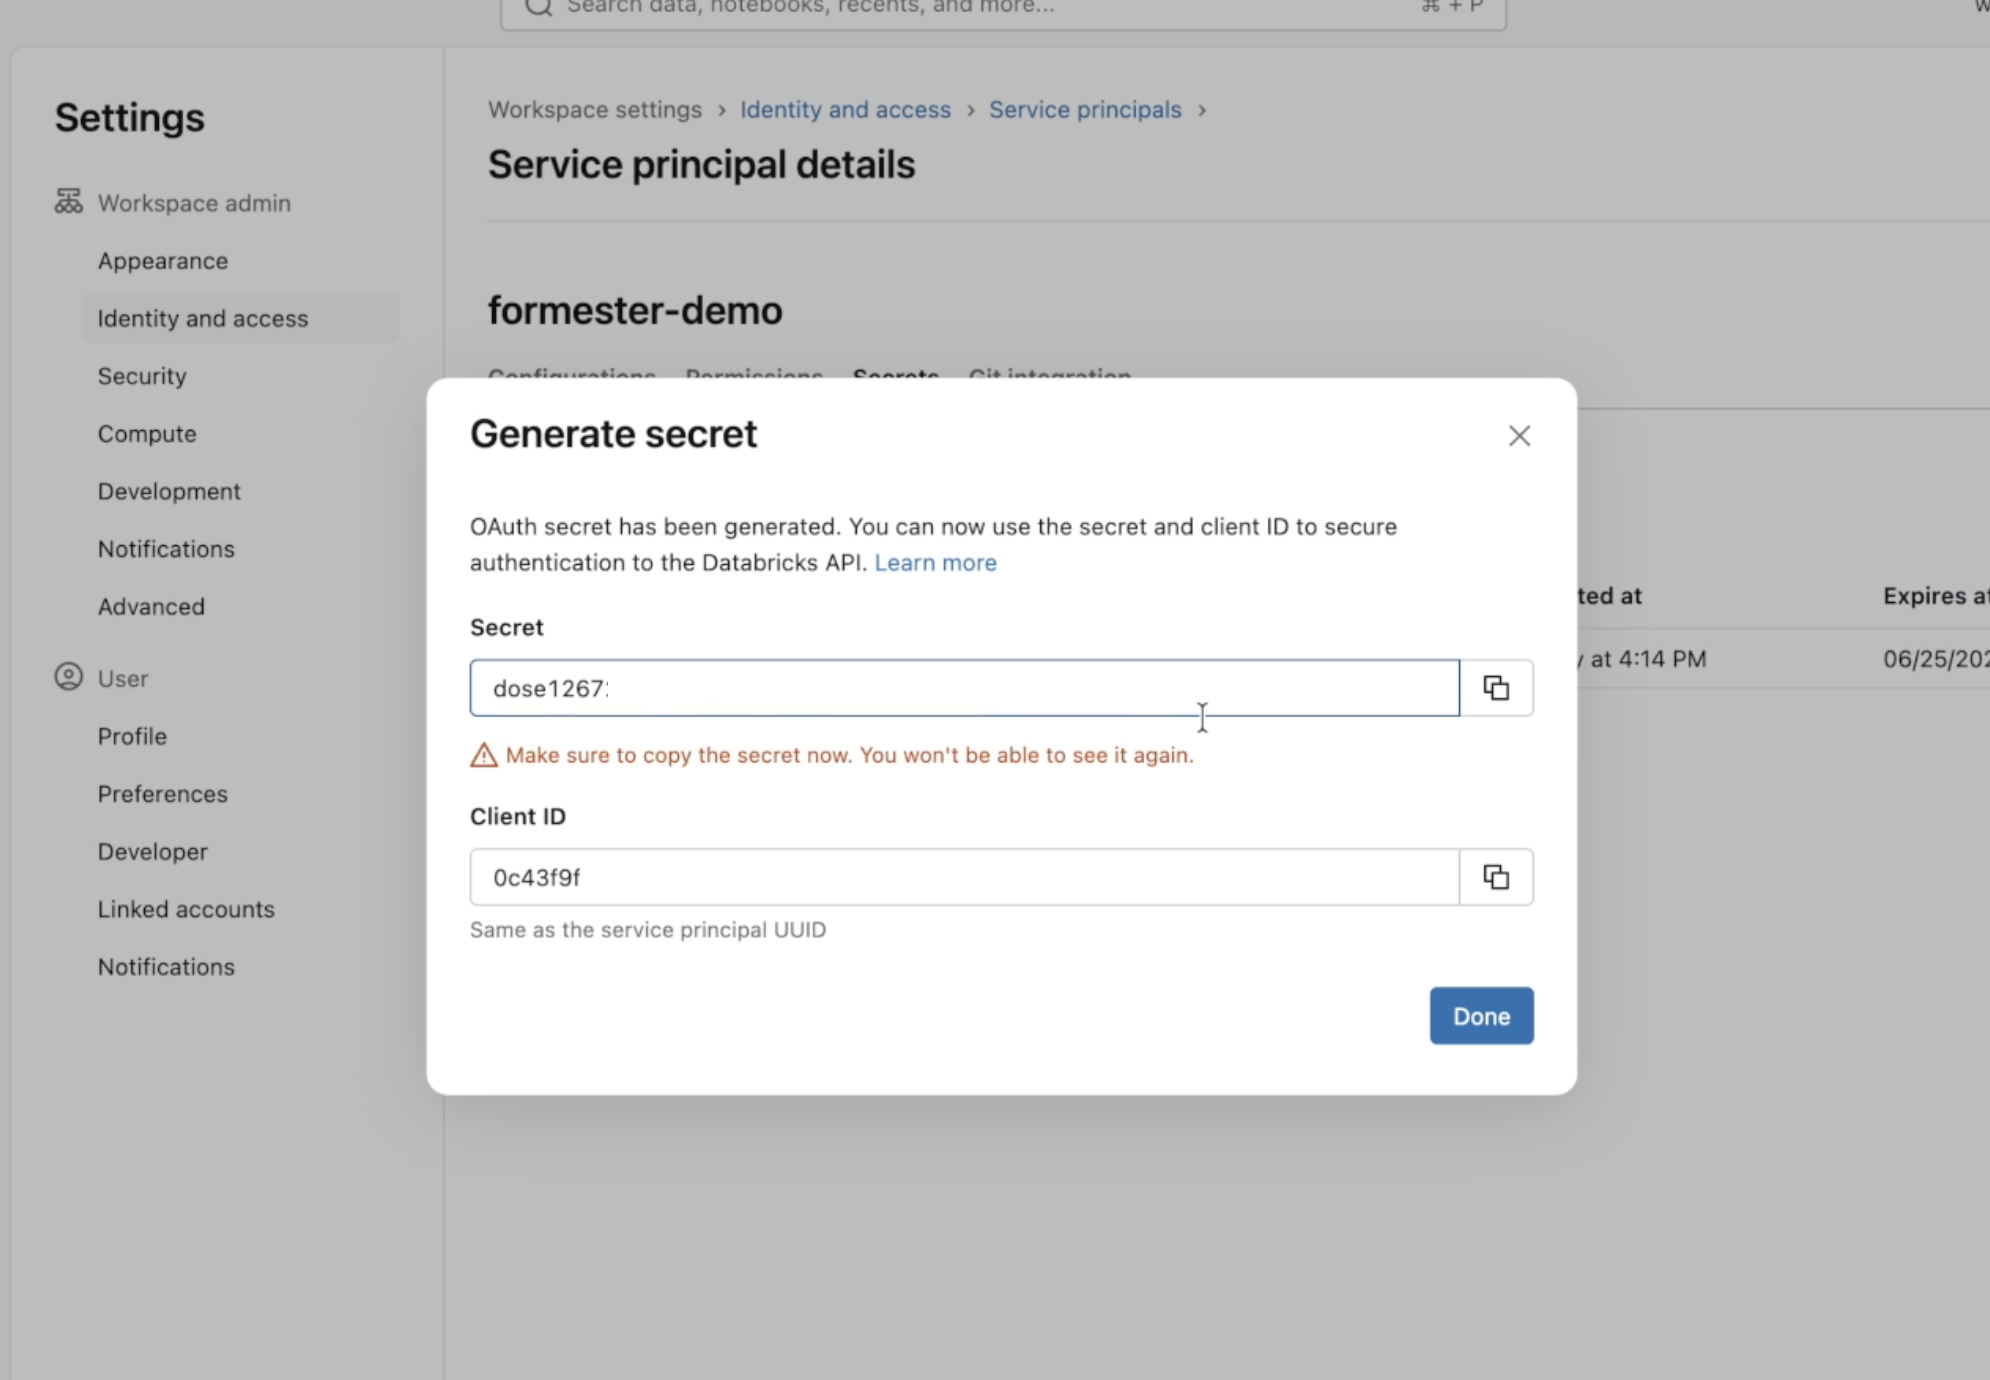
Copy both the Secret and the Client ID now — the secret is shown only once and cannot be retrieved again. The Client ID is the same as the service principal UUID.
Step 4: Paste them into Formester
Back in the Formester panel, paste the Service Principal Client ID and Client Secret.
Grant Catalog Permissions to the Service Principal
The service principal needs permission to create and write tables in your catalog.
Step 1: Open catalog permissions
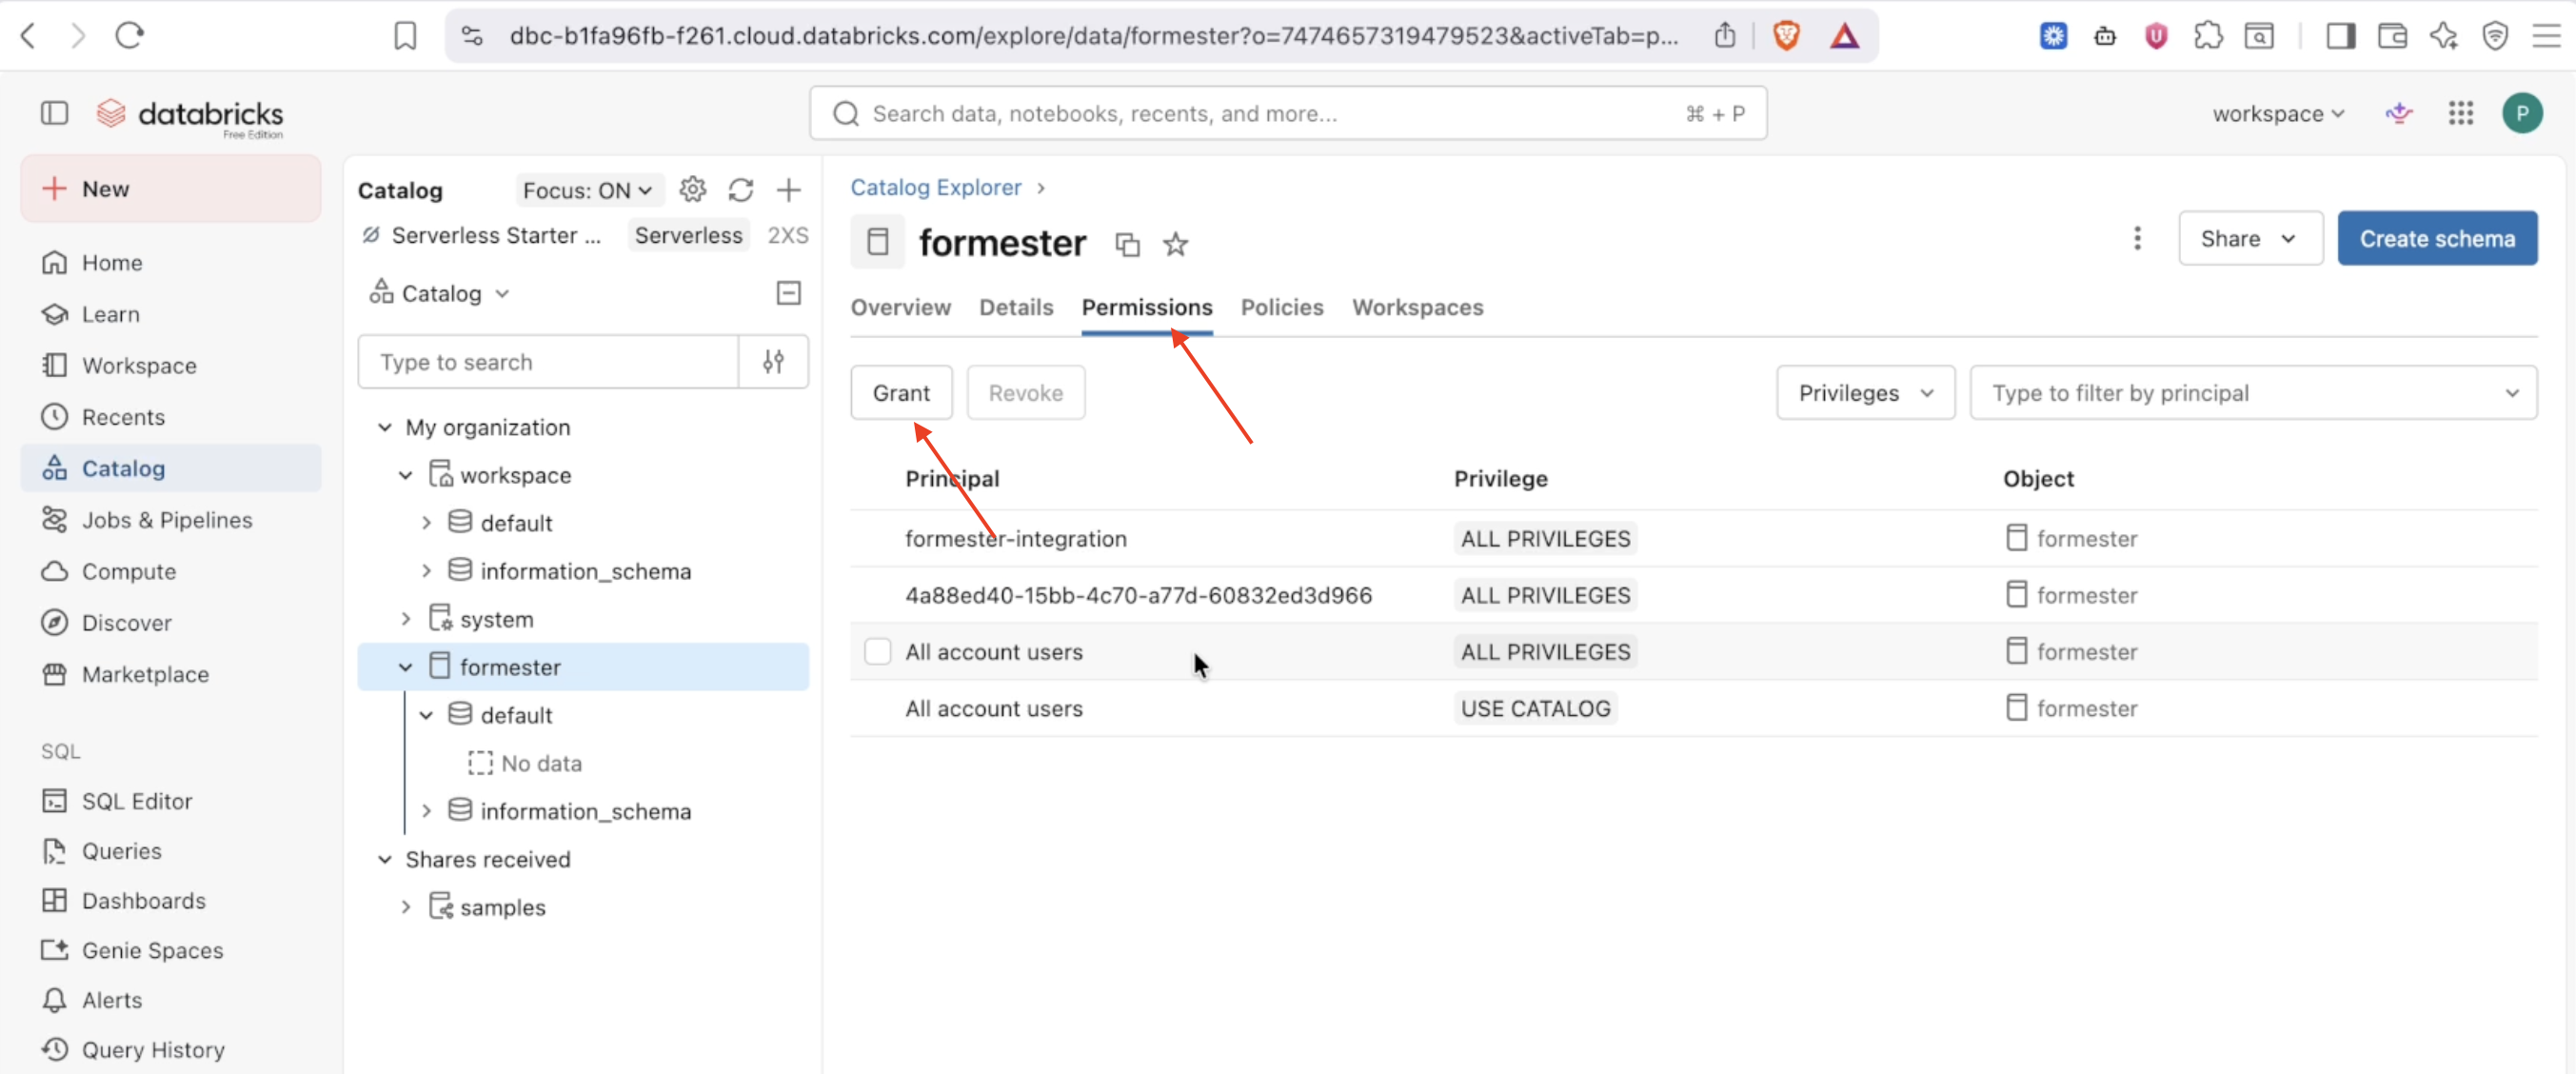
In Catalog, select your catalog (for example, formester), open the Permissions tab, and click Grant.
Step 2: Grant privileges
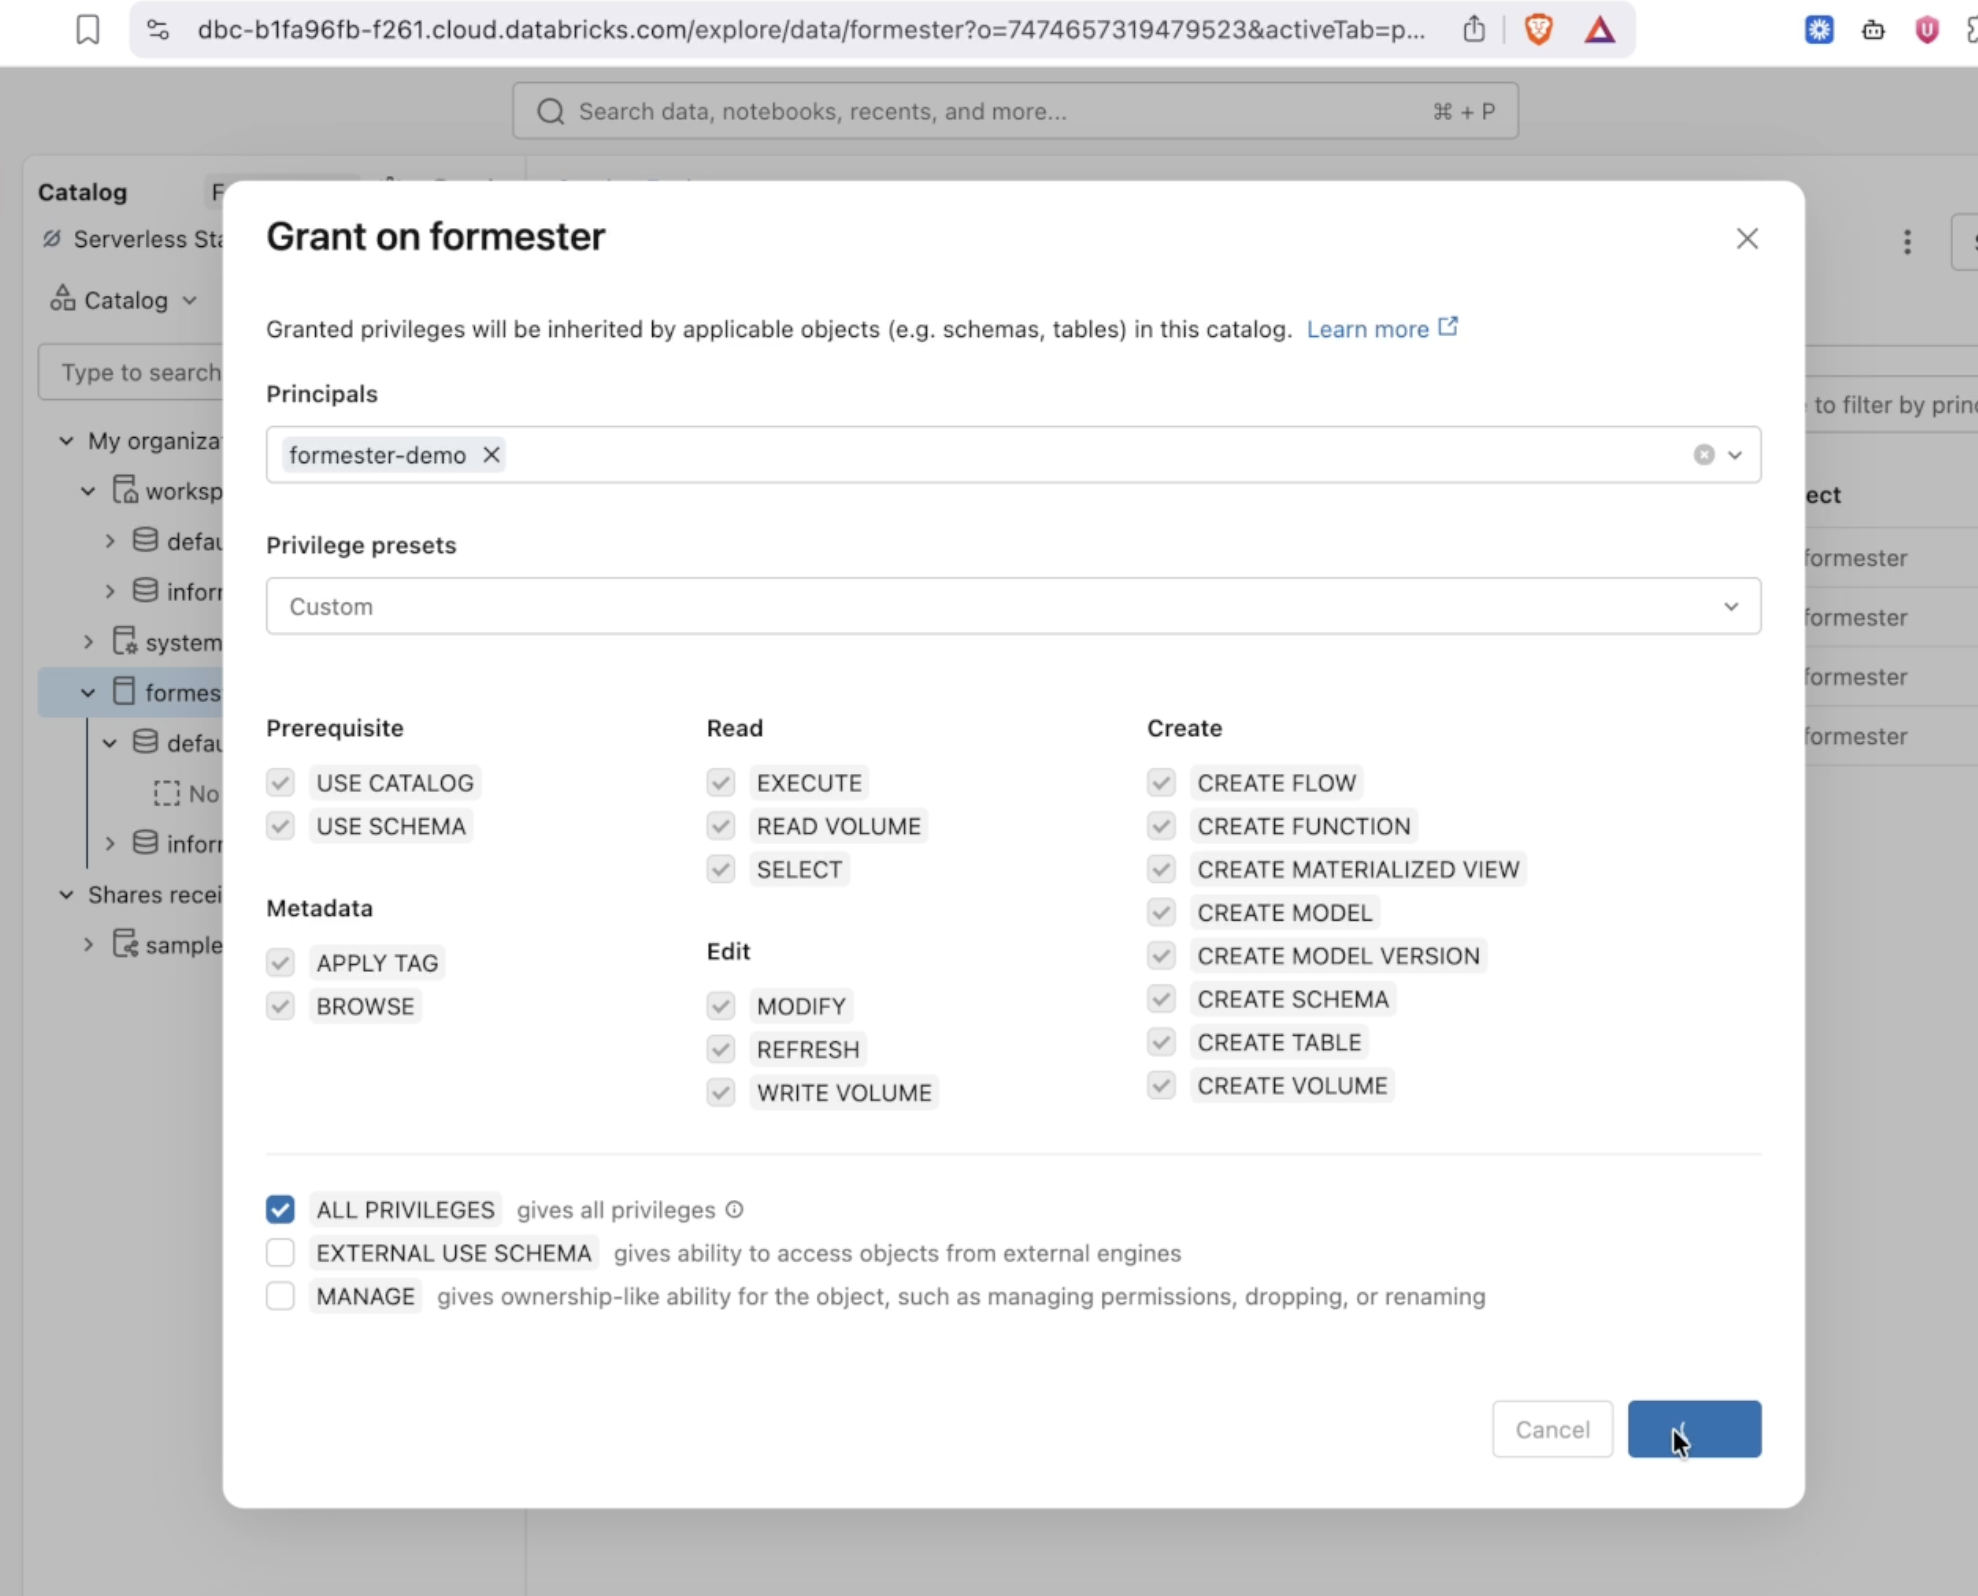
In the Grant dialog, under Principals select your service principal (for example, formester-demo). Check ALL PRIVILEGES so it can create schemas, tables, and write data, then click Confirm.
Connect Databricks in Formester
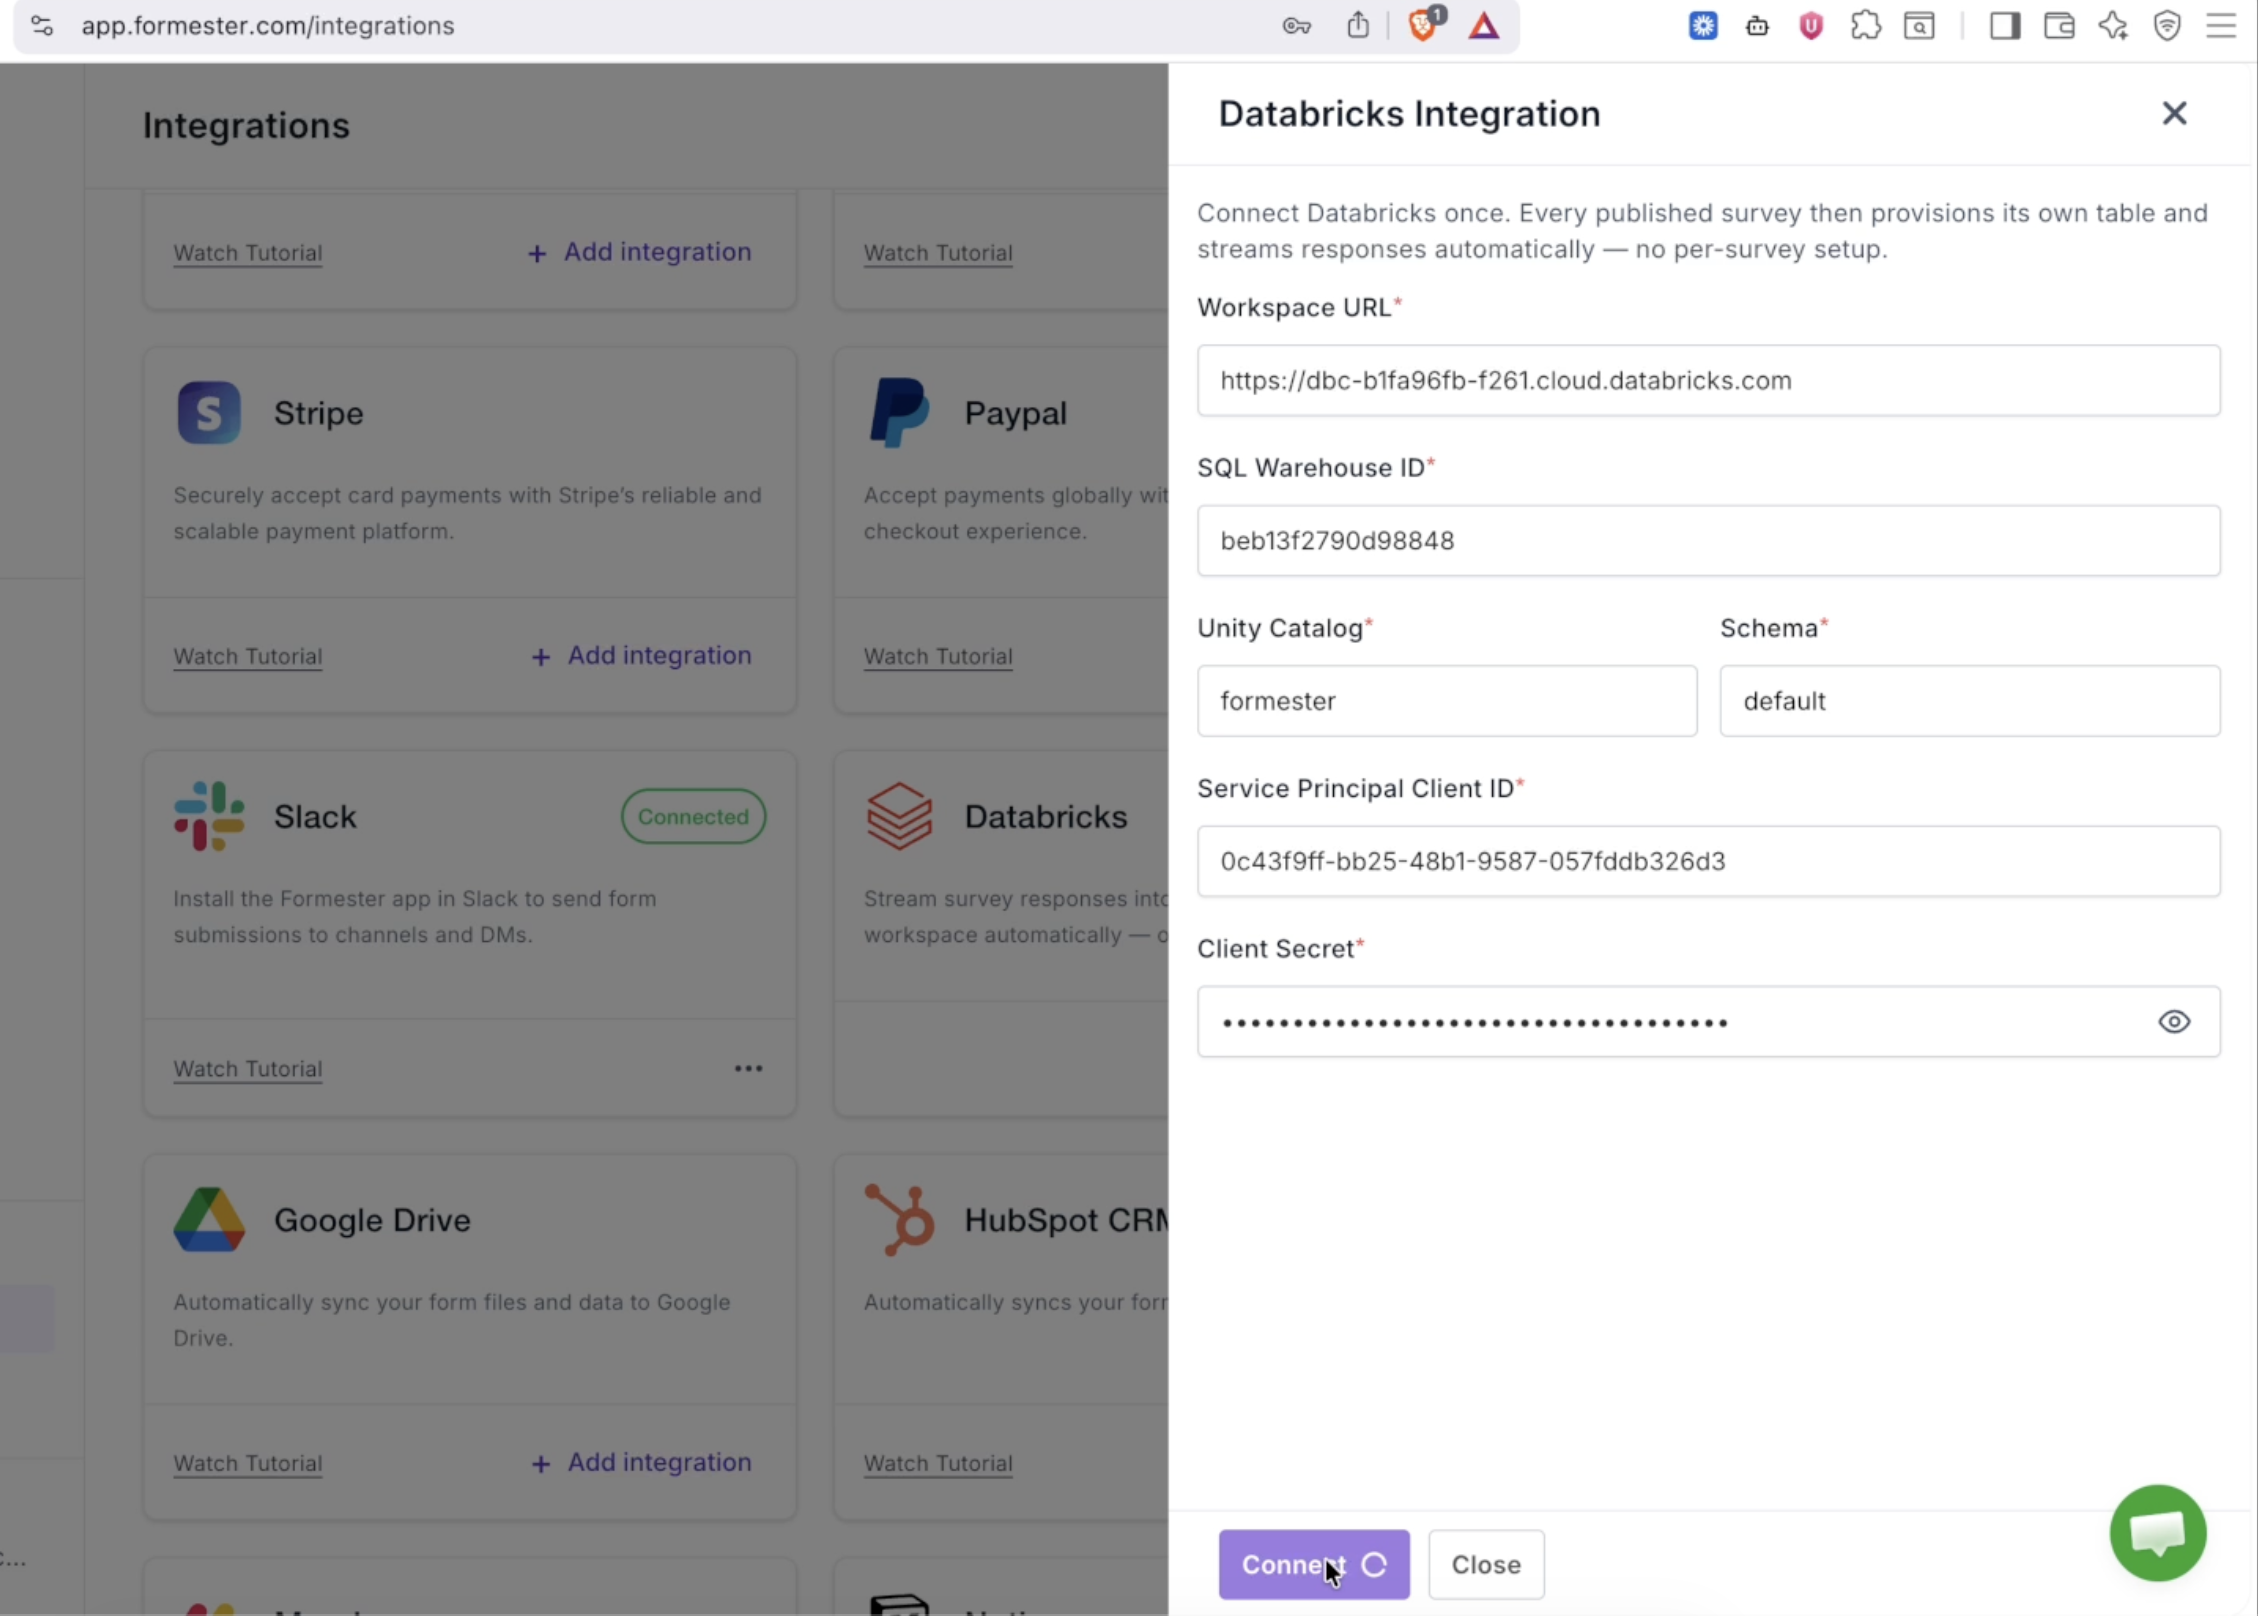
With all six fields filled in — Workspace URL, SQL Warehouse ID, Unity Catalog, Schema, Service Principal Client ID, and Client Secret — click Connect in the Formester panel.
Formester tests the connection. The Databricks card shows Pending / Testing… while it verifies the credentials, then switches to Connected once the test succeeds.
Stream Form Responses to Databricks
You only connect Databricks once. From now on, every published form provisions and streams to its own table automatically.
Step 1: Create and publish a form
Create a new form in Formester and click Publish. When the form is published, Formester automatically creates a table for it in your configured catalog and schema.
Step 2: Submit a response
When a respondent submits the form, Formester inserts the response as a row into that table. Open Catalog → your catalog → your schema in Databricks to see the table and query the incoming responses.
Congratulations! Your forms now stream survey responses straight into Databricks — one table per form, kept in sync automatically.